

Home & Decor Blogs: DIY, Interior Design & Lifestyle Ideas
DigiTrak SE ST 12 Transmitter: A Beginner’s Guide
If you run a DigiTrak SE system, the transmitter does the hidden work that makes surface locating possible. It sits in the drill head, sends the signal, and gives the locator the data needed to track the bore, read depth, and monitor pitch.
That sounds simple. In the field, it is only simple when the setup is right.
A transmitter can be installed wrong. A housing can be slotted wrong. Batteries can be weak. Interference can distort readings. A crew can trust numbers that should have been checked before the bore started. That is why the basics matter.
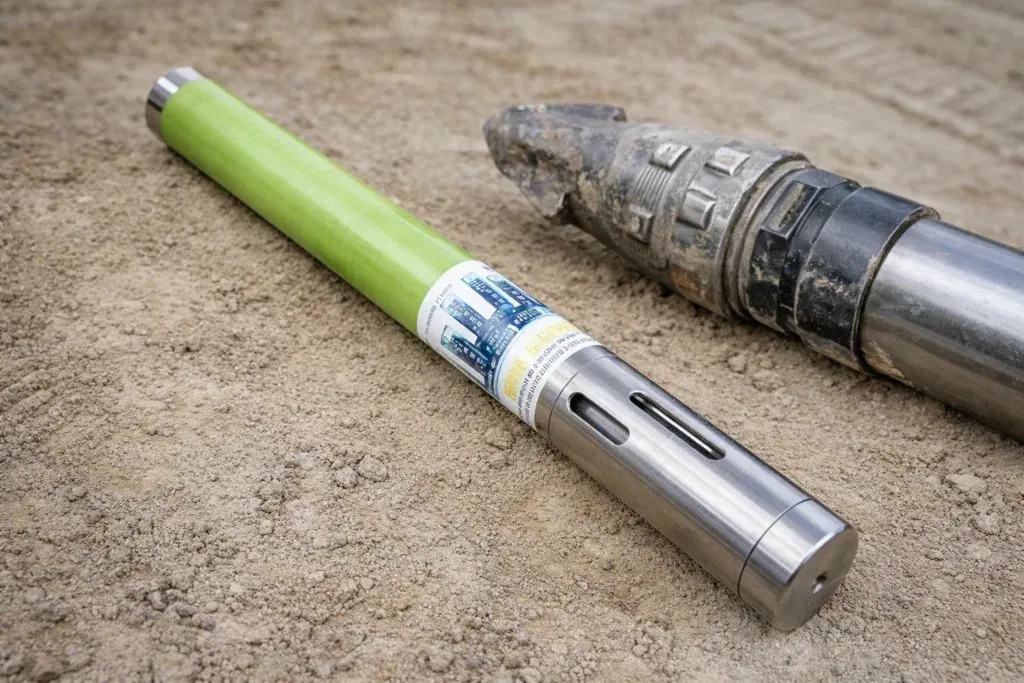
The DigiTrak SE ST 12 is a standard-range 12 kHz transmitter built for DigiTrak SE systems. It is 15 inches long, 1.25 inches in diameter, and has a published depth range of about 50 feet under the right conditions. It reports pitch in 1% or 1° increments. For many HDD crews, that makes it a practical tool for everyday locating work where clean setup and solid field habits matter.
This guide explains what the ST 12 is, what it works with, how to install it, what affects its performance, and what a beginner should check before drilling. The goal is simple: help you understand the tool, avoid common mistakes, and get more dependable performance in the field.
What the DigiTrak SE ST 12 is and where it fits
The DigiTrak SE ST 12 is a standard-range transmitter made for the DigiTrak SE platform. That point matters because compatibility is not something to guess at in HDD. The ST 12 is built for SE systems only. If a crew mixes the wrong components, it can lead to communication problems and unreliable tracking data. For a beginner, that is the first rule: make sure the transmitter belongs with the system you are using.
The ST 12 operates at 12 kHz. Its published dimensions are 15 inches long by 1.25 inches in diameter, and its listed weight is about 1.4 pounds. It is designed to provide pitch readings in 1% or 1° increments. In practical terms, it is the signal source that lets the locator read what is happening underground while the drill head moves through the bore path.
DCI classifies the ST 12 as a standard-range SE transmitter. That helps distinguish it from short-range options in the same family. A beginner does not need to memorize every transmitter in the lineup, but it helps to understand the category. Standard range tells you this model is meant for routine locating work where the conditions and depth fit the system’s normal operating window.
The published depth range is about 50 feet. That figure is useful, but it should not be treated like a promise on every jobsite. Range depends heavily on interference and field conditions. A cleaner site can support better performance. A noisier site can shorten range and affect reading quality.
For many contractors, the ST 12 fits routine SE work where correct installation, calibration, and pre-bore checks matter.
Why beginners should care about transmitter compatibility
A lot of tracking problems begin before the drill ever enters the ground. The parts look right. The crew assumes they are right. Then the numbers do not behave the way they should. One common cause is a mismatch between system components.
The ST 12 is compatible with DigiTrak SE systems only. That is not a minor detail. It is a setup rule. If a contractor is new to the SE platform, working with used equipment, or replacing a failed transmitter in a hurry, this is one of the first items to confirm. A transmitter that does not belong with the receiver can lead to failed communication, unreliable data, and wasted time on troubleshooting that should never have been needed.
There is also a regional matching requirement. The regional designation number on the transmitter and the receiver must match. That requirement supports proper communication and local compliance. For a beginner, that means you should not just check the model name. Check the region match too.
Used equipment adds another layer. Many HDD contractors buy replacement electronics on the secondary market because it can be faster or more cost-effective than buying new. That can be a practical move, but only if the part has been matched correctly to the system it will serve. When contractors need help identifying the right replacement, the real value is not just finding a part. It is getting the right part for the system already in the field.
Core specifications beginners should understand
A good beginner guide should explain the specs in plain English. The ST 12 is not hard to describe once you strip away the clutter. It is a 12 kHz SE transmitter with a 15-inch body, a 1.25-inch diameter, and a published depth capability of about 50 feet. It reports pitch in 1% or 1° increments. It uses either two C-cell alkaline batteries or one SuperCell battery.
Those numbers are not there for decoration. Each one affects daily use. The length and diameter tell you whether the transmitter matches the housing and drill-head setup you plan to use. The frequency matters because it is part of how the transmitter communicates with the receiver. The pitch output matters because pitch is one of the most important pieces of tracking data in HDD. If you do not trust pitch, you do not fully trust the bore path.
The published 50-foot depth figure is useful as a reference point, but beginners should read it with caution. In the field, performance depends on conditions. Electrical interference, passive interference from nearby metal, and overall site noise can reduce effective range. The number tells you what the tool is built to do under the right circumstances. It does not remove the need for pre-bore checks.
Temperature matters too. The ST 12 has a listed maximum temperature of 220°F. It is also described as shutting down above 183°F. That means heat is not just a maintenance concern. It is an operating concern. If a crew ignores heat, the transmitter can stop working when it is needed most.
In short, the ST 12 specs tell you how to fit, power, track, and protect the tool.
Which specs matter most in day-to-day HDD work
Not every spec deserves equal attention in the field. Some numbers matter every day. Others matter only when something goes wrong. For the ST 12, four items should stay near the top of the list: compatibility, fit, battery setup, and temperature.
Compatibility comes first because nothing else matters if the transmitter is wrong for the system. The ST 12 is an SE transmitter. It belongs with SE equipment. That check should happen before the transmitter is ever loaded into a housing.
Fit comes next. A transmitter can have the right model number and still perform badly if it sits in the wrong housing or in a housing with poor slotting. The published dimensions matter because they affect that fit. A beginner should always think in terms of the full assembly, not just the transmitter by itself.
Battery setup matters because weak or incorrect power creates avoidable problems. The ST 12 uses two C-cell alkaline batteries or one SuperCell. Once the batteries are installed correctly, the transmitter powers on and the signal should be verified with a compatible receiver before drilling starts.
Temperature rounds out the list because heat can end a job fast. The ST 12 has clear heat limits. That makes temperature something to monitor, not something to ignore. A crew that understands these four areas will avoid a large share of beginner mistakes before they turn into downtime.
How to install the ST 12 the right way
Installation starts with batteries, but it does not end there. A beginner should think of installation as a sequence: power the transmitter correctly, place it in the proper housing, confirm the housing slots meet the required dimensions, and verify signal before the bore begins. If one step is weak, the rest of the setup can suffer.
The ST 12 uses two C-cell alkaline batteries or one SuperCell battery. Once the batteries are installed correctly, the transmitter powers on. That is the easy part. The next step is more important: verify that the receiver detects the signal as expected. Do not assume that fresh batteries mean the system is ready. Always confirm the signal before moving on.
Housing setup is critical. The housing should have at least three slots equally spaced around the circumference. Each slot should be at least 1/16 inch wide, measured from the inside. For the ST 12, the slots must be at least 8.5 inches long and begin at least 2 inches but not more than 3 inches from the front of the transmitter. These are not minor details. Slot length and slot placement affect signal transmission. Bad slotting can weaken performance and make good equipment look unreliable.
A beginner should also pay attention to the condition of the battery cap, threads, and O-ring. Keeping those parts clean helps protect the transmitter from avoidable wear. Basic care is part of correct installation.
When crews rush, they often install first and question later. That habit costs time. The better habit is simple: install carefully, verify the signal, and start the bore only after the basics are confirmed.
Common installation mistakes that create bad tracking data
Most tracking problems do not come from mystery failures. They come from ordinary mistakes. Beginners can avoid many of them if they know what to watch for.
The first mistake is treating battery installation like the only setup step that matters. Yes, the transmitter has to power on. But power alone does not prove readiness. A crew still needs to verify the signal with the receiver before drilling. Skipping that check can send the crew into the bore with false confidence.
The second mistake is overlooking housing slot requirements. This is a major one. The ST 12 depends on proper slot dimensions and slot placement in the housing. If the slots are too short, too narrow, uneven, or in the wrong position, signal performance can suffer. The transmitter may still appear to work, but readings may not be as dependable as they should be.
The third mistake is using mismatched equipment. That includes the wrong SE component mix or a region mismatch between receiver and transmitter. A beginner may not know to check the regional designation number, but that check matters for communication and compliance.
The fourth mistake is poor maintenance at the point of installation. Dirty threads, neglected O-rings, or careless battery-cap handling can shorten tool life and create preventable problems.
These are not advanced issues. They are basic field habits. That is good news. Basic habits are easier to fix than complex failures, and they often produce the biggest gains in reliability.
How the ST 12 works in the field
Once the transmitter is installed and active, it becomes the underground signal source for the locating process. The receiver at the surface reads that signal and helps the locator determine the position of the drill head, including pitch and depth. For a beginner, the goal is not to master every detail at once. It is to understand the basic workflow and know what the readings depend on.
The quick start process centers on finding the front locate point, rear locate point, and locate line. The locator finds the FLP and RLP, takes predicted depth at the FLP, then finds the LL and checks actual depth by holding the trigger at the LL. One detail beginners should remember is that the FLP and RLP are not equidistant from the LL when the transmitter is pitched. That matters because a beginner might expect a perfectly even pattern and get confused when the field picture does not look that way.
Pitch output is one of the ST 12’s core functions. Because the transmitter reports pitch in 1% or 1° increments, it gives the crew usable directional information during the bore. But that information only helps if the crew respects setup, calibration, and interference checks.
The ST 12 Transmitter also has a sleep feature. After 15 minutes of inactivity, the transmitter goes into sleep mode. To wake it, rotate the drill string. That sounds like a small point, but it is worth knowing. A beginner who does not understand sleep mode may think the transmitter has failed when it has simply gone inactive.
In the field, good tracking is not about magic. It is about signal, setup, and disciplined locating habits.
What beginners should know about depth, pitch, and sleep mode
The ST 12 gives beginners three practical things to watch: depth, pitch, and operating state. Each one seems obvious until the jobsite gets busy and assumptions start replacing checks.
Depth is never just a number on a screen. It is a number shaped by site conditions, signal quality, and locating technique. The ST 12 has a published depth range of about 50 feet, but that range depends on the level of interference around the bore. A beginner should treat depth as a reading that must be earned through proper setup, not accepted blindly because the receiver displays it.
Pitch is the transmitter’s way of telling the crew how the drill head is angled. The ST 12 reports pitch in 1% or 1° increments, which gives the locator and operator a clear working reference. That matters during steering and when confirming whether the bore is behaving as expected. If pitch seems strange, the answer is not to force the work forward. The answer is to check setup, calibration, and site conditions.
Then there is sleep mode. The ST 12 goes to sleep after 15 minutes of inactivity. It wakes when the drill string rotates. That behavior protects the tool, but it can confuse a beginner who is not expecting it. A quiet transmitter is not always a failed transmitter.
Good crews learn to separate normal transmitter behavior from real trouble. That skill comes from understanding how the tool is supposed to behave before the job gets complicated.
Why calibration and interference checks matter so much
If there is one lesson every beginner should learn early, it is this: the transmitter is only as trustworthy as the setup around it. Calibration and interference checks are not paperwork steps. They are what stand between a clean bore and bad information.
Calibration is required before first-time use and before using a different transmitter, receiver, or drill head. That alone tells you how important it is. A change in equipment means the system needs to be checked again. The quick start guidance also says calibration should be done in an interference-free environment with the transmitter in a housing. That detail matters because calibration is supposed to reflect real operating conditions as closely as possible.
Daily tape-measure checks are also recommended. That is good practical advice. It keeps the crew from relying on yesterday’s assumptions. A transmitter may have worked on the last job and still need attention today.
Interference is the other half of the equation. SE guidance distinguishes active interference from passive interference and warns that interference can cause inaccurate depth readings and loss of pitch, roll, or heading. The background noise check before drilling is one of the most important steps in the setup.
A useful rule is this: with the transmitter on, the signal should be at least 150 points above ambient background noise at the bore’s maximum depth. If the difference is under 150, electrical interference is excessive.
That is why experienced crews test first. They know a bad site can make good equipment look bad.
How to think about interference before a bore starts
Interference is one of the hardest lessons for beginners because it does not always announce itself clearly. The receiver still turns on. The transmitter still sends a signal. The numbers still appear. That can create a false sense of security. But interference can quietly reduce range, distort depth, and affect pitch, roll, or heading data.
The first useful distinction is between active interference and passive interference. Active interference usually comes from sources that generate electrical noise. Passive interference often comes from nearby metal and other site conditions that affect the field. A beginner does not need to become an engineer to respect the difference. The important point is that both can damage the quality of the locating data.
That is why pre-drilling testing matters so much. The crew should check background noise before drilling, not after the readings start looking strange. The practical benchmark is simple: at maximum bore depth, the transmitter signal should stand at least 150 points above ambient background noise. If it does not, the site has too much electrical interference for that setup to be trusted without adjustment.
This mindset changes how a crew works. Instead of asking, “Why did the readings go bad?” the crew asks, “Did we prove the site was clean enough before we started?” That is a better question. It catches trouble earlier and protects the job.
Heat, care, and everyday maintenance
A transmitter is not just an electronic part. It is a field tool. Field tools fail early when crews treat them like sealed mysteries instead of working equipment that needs basic care. The ST 12 is no different.
Temperature is a major concern. The ST 12 has a listed maximum temperature of 220°F, and it is also described as shutting down above 183°F. That means heat is not a distant spec for a catalog page. It is a real operating limit that affects whether the tool keeps working during a bore. For a beginner, that should shape behavior. If the crew is pushing conditions that create excessive heat, it is risking signal loss and downtime.
Daily care matters too. General transmitter care guidance emphasizes keeping battery-cap threads clean, protecting the O-ring, and avoiding chemical exposure that can damage the tool. These are small habits, but small habits matter. Dirt in the wrong place, a damaged seal, or careless handling during battery changes can shorten tool life.
A beginner should also understand that maintenance supports reliability as much as it supports longevity. A neglected transmitter is more likely to create uncertainty in the field, and uncertainty costs time. Crews stop. They second-guess the numbers. They troubleshoot in the middle of the work instead of before it.
Good maintenance is quiet. It does not look dramatic. That is why some crews skip it. Smart crews do not. They know dependable tracking starts with simple care done consistently.
When to replace an ST 12
There comes a point when basic care is not enough. A transmitter may have recurring signal problems, heat-related shutdowns, damaged external components, or wear that makes crews lose confidence in the tool. That is when the conversation shifts from maintenance to replacement.
For many HDD contractors, the real question is not whether they need an ST 12. It is how fast they can get a working one back in service without overspending or waiting too long. That is where the secondary market matters. A contractor running an SE system may need a replacement that matches the existing setup, works correctly, and supports the next job.
That is one practical reason companies turn to UCG HDD. A contractor may not need a long search. The contractor may need a dependable replacement unit, a refurbished option that makes financial sense, or help identifying the correct transmitter for the system already in the field.
Price matters, but fit matters too. The wrong replacement wastes time. The right one gets the crew back to work. When an ST 12 becomes a source of doubt rather than a source of data, replacement becomes a practical decision.
What a beginner should check before drilling
A good pre-bore routine is one of the best habits a beginner can build. It reduces avoidable mistakes and makes the rest of the job smoother. The ST 12 does not ask for anything exotic, but it does ask for discipline.
Start with compatibility. Confirm that the transmitter is an ST 12 for the DigiTrak SE system and that the regional designation matches the receiver. Next, confirm the power setup. Install the correct batteries and verify that the receiver detects the signal properly. Do not skip the signal check.
Then look at the housing. Make sure the housing slotting meets the required dimensions and placement for the ST 12. A transmitter cannot perform as intended if the housing blocks or weakens the signal. After that, confirm calibration. Calibration is required before first-time use and when using a different transmitter, receiver, or drill head. A daily tape-measure check is also a smart routine.
Finally, check the site. Measure background noise and think seriously about interference before you begin drilling. The published rule about signal strength being at least 150 points above ambient background noise at maximum depth gives the crew a practical benchmark.
This is what beginners should understand: strong tracking rarely starts with a heroic correction in the middle of the job. It starts with patient checks before the job begins.
The crews that seem calm in the field are usually the crews that did their work early.
A simple beginner checklist for the ST 12
A checklist helps because it turns field knowledge into repeatable habits. For the ST 12, a beginner can keep the routine simple and still cover the essentials.
First, confirm system fit. Make sure the transmitter is an ST 12 and that it belongs with a DigiTrak SE system. Then check the regional designation match between transmitter and receiver. If the parts do not match, stop there and fix that issue first.
Second, install the correct batteries. The ST 12 uses two C-cell alkaline batteries or one SuperCell. After installation, verify that the receiver reads the signal. Do not assume the system is ready just because the transmitter powered on.
Third, inspect the housing. Check that the slots are present, evenly spaced, and sized correctly for the ST 12. Slotting is not a cosmetic detail. It affects signal performance directly.
Fourth, confirm calibration. If this is first-time use or the crew changed the transmitter, receiver, or drill head, calibration is required. A daily tape-measure check adds one more layer of confidence.
Fifth, check interference. Measure background noise before drilling. Compare expected transmitter signal strength against ambient conditions at the planned bore depth.
Sixth, stay aware of heat and operating state. Remember that the ST 12 can enter sleep mode after 15 minutes of inactivity and that excessive temperature can force a shutdown.
That is a short list. It is also the kind of list that prevents long problems.
Final thoughts
The DigiTrak SE ST 12 is a straightforward tool when you respect what it needs. It is a 12 kHz standard-range transmitter for DigiTrak SE systems. It gives you pitch data, supports routine locating work, and can perform well when the setup is right. Problems usually come from the basics: wrong match, weak checks, bad slotting, poor calibration, interference, or neglected maintenance.
That is why a beginner should focus less on buzzwords and more on habits. Confirm compatibility. Install it correctly. Check the housing. Verify the signal. Calibrate when required. Test for interference. Watch heat. Understand sleep mode. None of that is glamorous, but it is what makes tracking more dependable.
For HDD contractors, utility contractors, and equipment owners, that practical approach matters more than sales language. The tool has one job: help the crew trust what it sees underground.
And when your current transmitter is worn out, questionable, or simply not the right fit, getting the correct replacement matters just as much as knowing how to use it. UCG HDD can help contractors solve that problem with practical equipment support and replacement options built around what crews already run in the field.
That is the real beginner lesson: good results usually come from good basics, done well, every time.