

Home & Decor Blogs: DIY, Interior Design & Lifestyle Ideas
What Is Rectified Tile and When Should You Use It
You are knee deep in a kitchen remodel, staring at a stack of gorgeous porcelain tiles that promise to transform your boring backsplash into a sleek masterpiece. But then the salesperson drops a term that stops you cold: “rectified.” Suddenly, you’re second guessing everything. Is it some fancy upgrade, Or just tile talk that’s overcomplicated on purpose, I’ve been there, sweating over tile choices that felt like decoding a secret language. That’s why I’m spilling the beans today on rectified tile what it really is, why it might be your new best friend (or not), and exactly when to pull the trigger on it.
What Is Rectified Tile
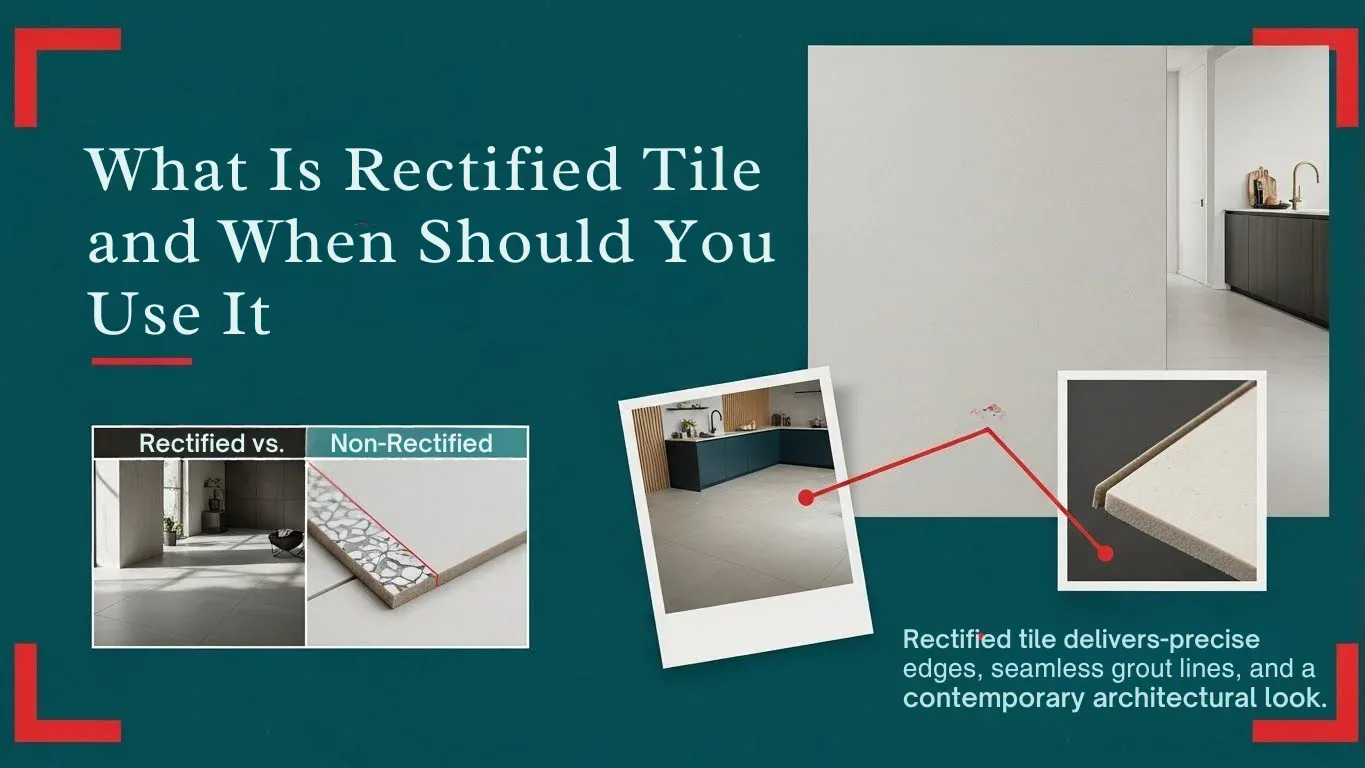
Let start simple because, trust me, tile jargon doesn’t have to feel like a physics exam. Rectified tile is basically porcelain or ceramic tile that’s had its edges mechanically trimmed after it’s been fired in a kiln. This extra step makes every side super precise, almost like the tile gods decided to give it a perfect haircut. Without this, tiles can come out with tiny irregularities think of it as the tile equivalent of bedhead after a wild night.
Firing tiles in those massive kilns at scorching temperatures (we’re talking over 2,000 degrees Fahrenheit) causes the clay to shrink and warp just a smidge up to 1.5% variation, which is totally normal. Manufacturers fix that post-bake by grinding or sawing the edges on a machine. Tiles that measure exactly the same, down to a hair’s breadth. No more guessing games during layout. I remember my first big tile job; I grabbed what I thought were “standard” tiles, only to end up with a wavy backsplash that looked like it had the hiccups.
How Rectified Tile Evolved from Humble Clay to Home
Tiles have been dressing up floors since ancient Mesopotamia, where folks pressed clay into molds for basic patterns. Fast-forward to the Industrial Revolution, and mass production kicked in, but edges stayed rough because who had time for perfection? Enter the 1990s: Italian tile makers, those style wizards, started experimenting with bigger slabs to mimic stone without the hefty price tag. By the 2000s, rectification became standard for high-end porcelain, driven by architects chasing minimalist looks in spas and lofts.
Today, in 2025, rectified tile is booming thanks to smart home trends. Think integrated heating under ultra-thin grout lines or tiles that double as interactive screens okay, that’s a stretch, but with tech like photovoltaic tiles on the horizon, precision edges are key for seamless installs. Unlike competitors who skim over this, understanding the roots helps you appreciate why rectified isn’t just trendy; it’s a nod to craftsmanship meeting innovation. Ever wonder why your grandma’s kitchen tiles feel so Uneven edges were the norm. Now, we’re in the era of pixel perfect floors.
How Rectified Tile Gets Made From Kiln to Kitchen
Curious about the behind the scenes magic it starts with raw materials kaolin clay, feldspar, and silica mixed into a slurry and shaped via extrusion or pressing. Then, the fun part drying to leather hard consistency, glazing for that glossy finish (or matte for rustic vibes), and firing in a roller kiln for 40-60 minutes. That’s when shrinkage happens.
Post firing, here’s where rectification shines. Workers feed the tiles into a diamond-tipped saw or grinder that trims all four sides uniformly. It’s like edging a lawn with a laser precise and dust free if done right. The back often shows faint cut marks, a telltale sign you’re dealing with the real deal. This process adds about 10-15% to production costs but ensures tolerances under 0.5% way tighter than non rectified’s 1-2%.
One thing you won’t find in every guide: Environmental perks. Modern factories use water recycling in grinding, cutting waste by 70%, and many brands now source clay sustainably. In a world where green building is non-negotiable, rectified tile aligns with LEED certifications better than irregular stuff that wastes more during cuts.
Rectified vs. Non-Rectified
To really get why rectified rules (or doesn’t), let’s compare it head-to-head with its non-rectified cousin. Non-rectified tiles skip the edge trim, embracing those natural variations for a more organic feel. But does “organic” mean “better” Not always especially if you’re not into visible grout joints that scream “budget reno.”
| Feature | Rectified Tile | Non-Rectified Tile |
|---|---|---|
| Edge Precision | Ultra-precise (±0.5mm); machine-cut | Natural variation (±1-2mm); as-fired |
| Grout Line Width | Thin (1-3mm) for seamless look | Wider (3-6mm) for stability |
| Best Tile Size | Large formats (>12×12 inches) | Smaller formats (<12×12 inches) |
| Installation Ease | Requires flat subfloor; pro-level tools | More forgiving on uneven surfaces |
| Aesthetic Vibe | Modern, minimalist, uniform | Rustic, handcrafted, varied |
| Cost per Sq Ft | $4-12 (higher due to processing) | $2-8 (simpler production) |
The Perks That’ll Make You Smile
Alright, let’s talk upsides because who doesn’t love a good win, First off, that razor-sharp precision lets you rock super-thin grout lines I’m talking 1mm, folks. It creates this almost floating effect, like the floor’s one giant canvas. No more chunky white stripes stealing the show from your gorgeous gray slate-look tiles.
Speed is another sneaky benefit. With even edges, installers waste less time fiddling with shims or cursing lippage (that’s when tiles don’t sit flush nightmare fuel). In my buddy’s recent bathroom redo, using rectified cut the labor by two days. And visually? Say goodbye to shadows under edges from overhead lights. It’s like your room got a free facelift.
Porcelain’s already tough, but rectified’s clean lines mean less grout to crack over time. Plus, in high-traffic spots like entryways, uniform tiles distribute weight better, dodging that uneven wear. Oh, and for the eco-conscious among us, many rectified lines use recycled content up to 40% in some brands without skimping on style.
When Rectified Tile Might Trip You Up
No product’s perfect, and rectified tile has its grumpy moments. It’s a diva about flat surfaces. If your subfloor’s got more waves than a beach, those tiny edge matches will highlight every bump think funhouse mirror on your vanity. Pros recommend no more than 1/8-inch deviation over 10 feet, but DIYers often overlook this and end up with a headache.
Cost bites too. Expect to pay 20-50% more than non-rectified, especially for large formats. And installation? It demands pro tools a wet saw with diamond blade or you’ll chip edges like biting into stale bread. Grout choice matters; go non-sanded for thin lines, or it’ll scratch the surface faster than you can say “oops.”
Aesthetic mismatches happen if you’re after that cozy, imperfect charm. Rectified uniformity can feel sterile in farmhouses pair it wrong, and your space looks like a hospital lobby. Batch variations in color or shade? Still a thing, so blend boxes like you’re mixing paint.
Humor me here: I once saw a rectified install in a sunroom where the homeowner skipped leveling clips. A floor that sloped like a ski ramp. Tiles held, but guests kept asking if it was “modern art” Lesson learned precision cuts both ways.
When Should You Whip Out Rectified Tile
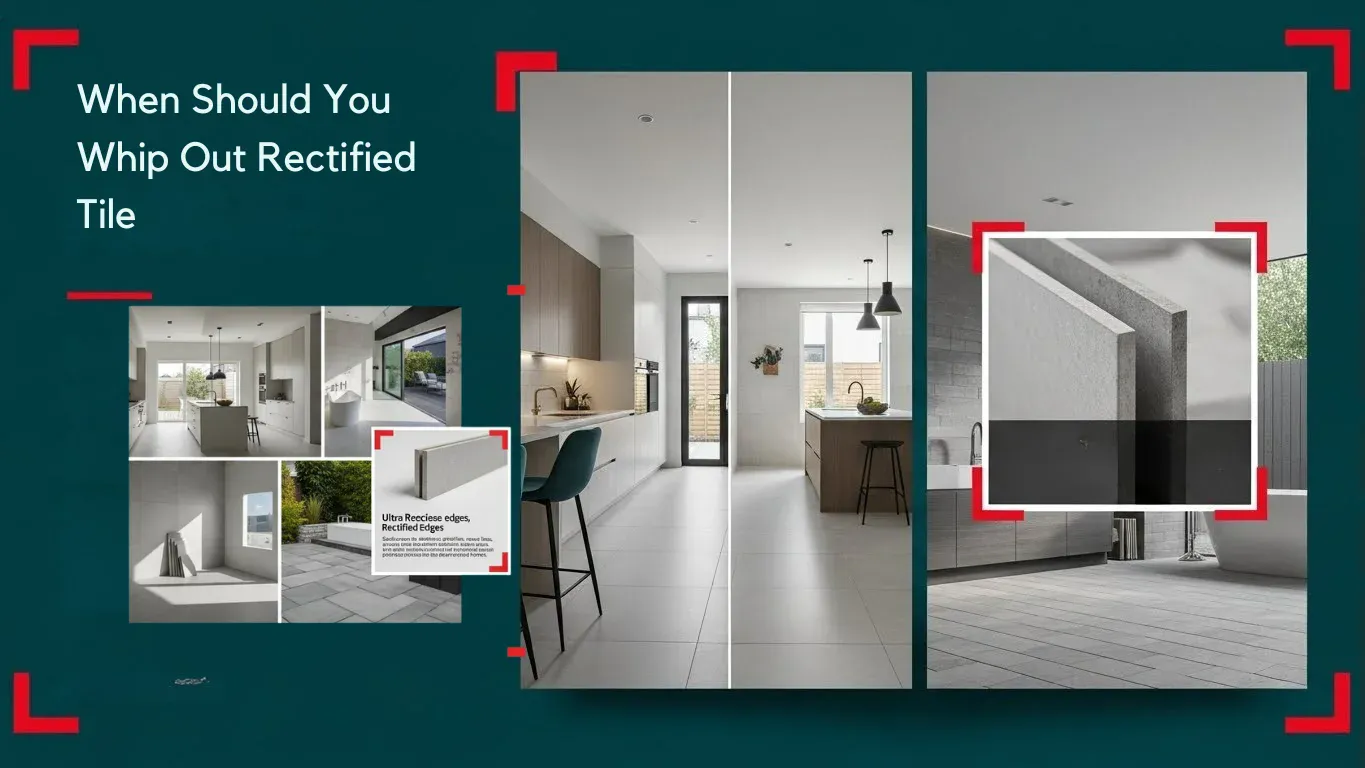
Timing is everything, right use rectified when you crave that polished, contemporary edge think open concept kitchens where tiles wrap from floor to wall without a hitch. It’s gold for large format installs, like 24×48-inch slabs mimicking marble. Fewer seams mean less cleaning and eternal durability.
In bathrooms, it shines for seamless showers; water beads off uniform joints, dodging mold hideouts. Patios with rectified pavers handle freeze-thaw cycles better, thanks to tight fits that keep moisture out. Even commercial spots hotels, cafes love it for quick, low-maintenance overhauls.
But hold off if you’re going rustic. Non-rectified’s quirks add soul. Skip it for small jobs where wide grout hides sins. And always, always check your space’s vibe.
Nailing the Install Your Foolproof Guide to Rectified Success
Ready to roll up your sleeves start with prep clean that subfloor like it’s a first date. Sweep, vacuum, then level with self-leveling compound if needed. Measure twice; layout dry first to spot pattern quirks.
Tools: Notched trowel for thinset (1/4×3/8-inch for large tiles), wet saw for cuts, leveling system (clips and wedges trust me, they’re $20 well spent). Apply adhesive in sections to avoid skinning, press tiles firmly, and space with 1-2mm horseshoe shims.
Let it cure 24 hours, then grout. Non-sanded for thinnies; float at 45 degrees, wipe excess pronto. Seal after 72 hours phew, breathe. Common pitfall? Rushing the cure. I did that once; grout hazed up like fogged glasses. Patience pays.
For trends in 2025, try hybrid installs: Rectified bases with LED strips under thin joints for ambient glow. Or sustainable lines from recycled ocean plastic precise and planet-friendly.
Keeping It Fresh Maintenance That Keeps Rectified Tile
Post-install bliss fades if you slack on care. Sweep or vacuum no mops that trap grit. Weekly, mild soap solution (pH-neutral, like diluted dish soap) with a soft mop. Avoid abrasives; they’ll dull that shine faster than a bad haircut.
Grout’s the weak spot seal yearly with penetrating sealer to fend off stains. Spills? Blot, don’t scrub. In small remodel kitchen, rectifier’s stain resistance rocks, but hot pots? Use trivets.
Long-term: Every five years, deep clean with a steam mop. And for outdoors, hose it down seasonally. My neighbor’s rectified patio? Looks brand new after three winters because she treats it like a prized pup.
| Cost Factor | Rectified Tile Estimate | Non-Rectified Comparison | Potential Savings Tip |
|---|---|---|---|
| Material (per sq ft) | $4-12 | $2-8 | Buy in bulk; look for 2025 eco-lines |
| Installation Labor | $5-10 per sq ft (precision premium) | $3-7 per sq ft | DIY small areas; hire for large |
| Tools/Supplies | $100-300 one-time (wet saw, levelers) | $50-150 | Rent saws; reuse clips |
| Long-Term Upkeep | Low ($20/year sealing) | Medium ($50/year grout repairs) | Annual seal = 5-year tile life boost |
For a 200 sq ft kitchen, rectified might run $2,000-4,000 total vs. $1,200-2,500 non. But factor in faster install and less grout refresh? It evens out in three years. New info: With rising material costs (up 15% in 2025 per industry reports), rectified’s efficiency saves on waste up to 20% less tile needed for cuts.
Real Talk from the Field Stories That Stick
To wrap the “when,” hear from Sarah, a Toronto designer: “Rectified saved my client’s loft reno 24×12 tiles with 2mm joints turned a drab space into Instagram gold. Non-rectified added warmth without the fuss.” Or Mike’s mishap: “Rushed a rectified shower without leveling. Water pooled like a kiddie pool. Lesson: Measure thy floor.”
Wrapping It Up
Whew, we’ve covered a lot from rectified precise origins to when it steals the show (and when to bench it). It’s not for every job, but when it fits, it transforms spaces with effortless elegance. Next time you’re tile shopping, channel this chat: Feel the edges, ask about tolerances, and envision that seamless dream.
FAQs
Q: Can I use rectified tile outdoors?
A: Absolutely, especially in covered areas. Its tight joints keep water out, but ensure proper slope for drainage to avoid slip ups.
Q: Is rectified tile harder to cut?
A: A tad, but a quality wet saw makes it easy. Practice on scraps your first cut sets the tone.
Q: What’s the thinnest grout line possible?
A: Down to 1mm with rectified, but 2mm is safer for newbies. It hides minor oopsies.
Q: Does rectified fade faster?
A: Nope porcelain’s UV-resistant. Just seal grout to match the tile’s longevity.
Q: Eco-friendly rectified options?
A: Brands like Daltile’s recycled lines cut carbon footprints by 30%. Look for Cradle to Cradle certs.