

Home & Decor Blogs: DIY, Interior Design & Lifestyle Ideas
Preventative Maintenance for Your Garage Door System (and Why Your Climate Changes What You Do)
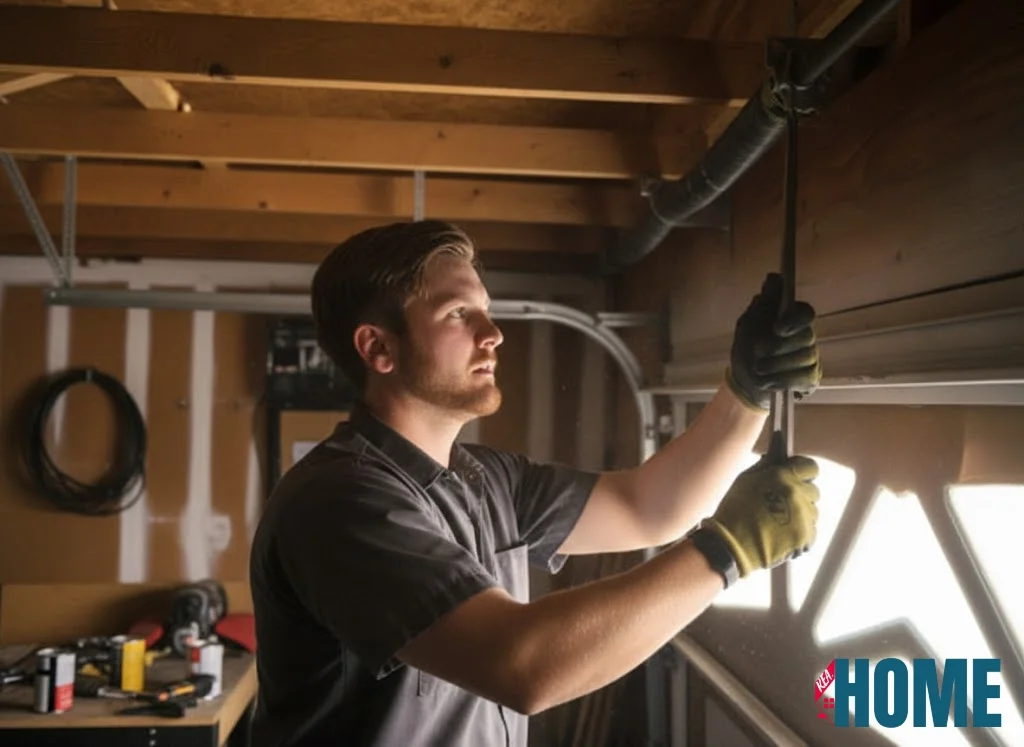
Your garage door is the biggest thing that moves in your house. You open and close it more often than the front door most weeks. You never think about it, right up until that morning when it groans halfway up and stops, your car behind it, your day already late.
On the plus side, almost none of those failures are complete bolts from the blue. The door tells you it’s going for weeks first. A new rattle. A jerk on the way up. A groan it didn’t use to make. Preventative maintenance is mostly just learning to notice those, and doing a few small things before the small things turn into a snapped spring on a Tuesday.
But there’s one part of this that no one really talks about, and it’s why so much of the online advice is useless: what you actually need to do depends heavily on where you live. Your door in dry, salty San Diego wears out totally differently than one in wet, gray Seattle. The same door wears out in completely different ways depending on what the local air is doing to it.
First, know what you’re looking at
You don’t have to be a technician, but you can’t maintain a thing you can’t name. A garage door isn’t one object, it’s a system, and when people say “the garage door broke” they almost always mean one specific part in that system quit.
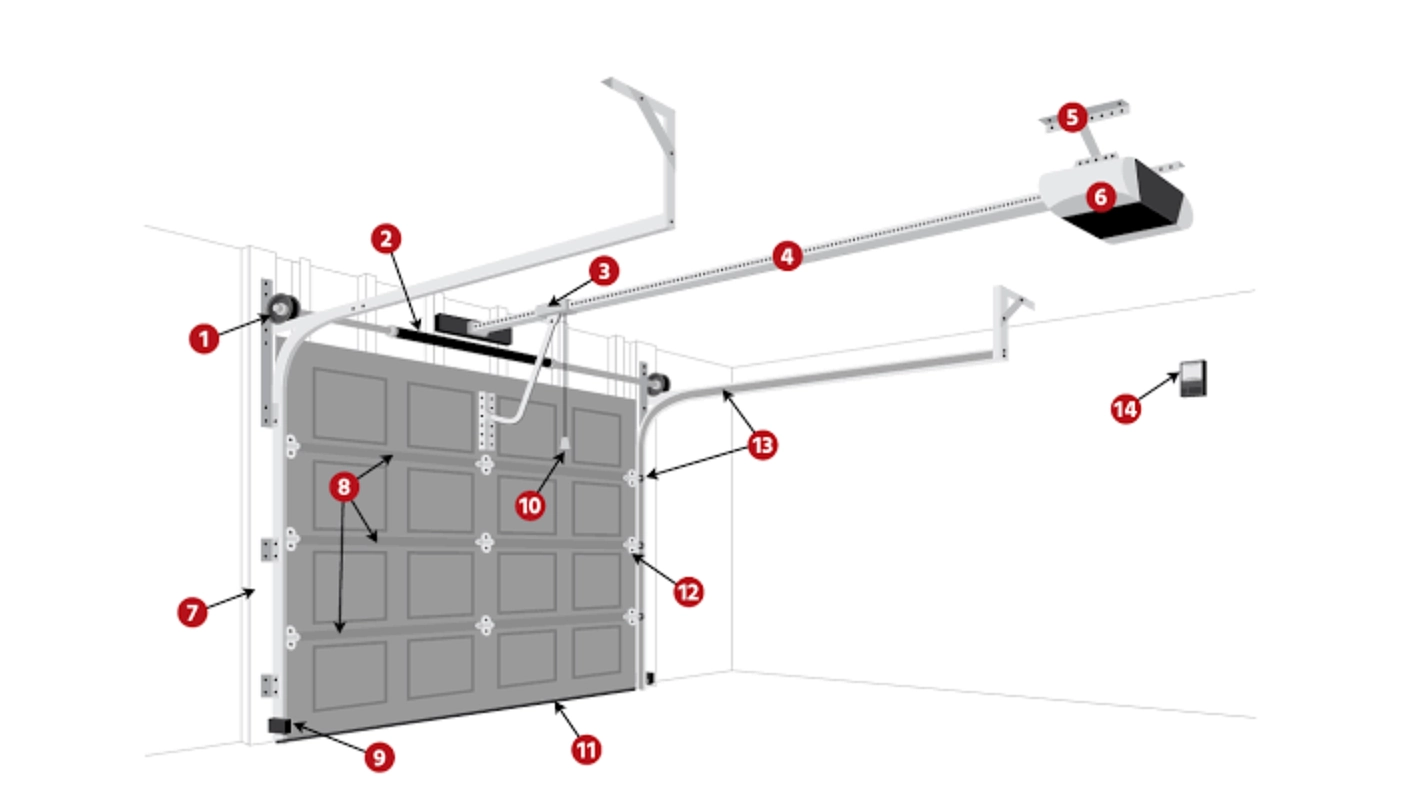
The ones that matter for maintenance, in plain terms:
- Springs: Either a torsion spring across the top, or a pair on either side, provides the lifting force. It’s under enormous strain. This is the part that most frequently fails and is most painful.
- Rollers: The little wheels that ride the tracks. Whenever they wear or seize, all other components are forced to drag the door along.
- Tracks: metal channels in which the rollers run. These can become dirty and out of alignment.
- Cables: Steel cables working in conjunction with the springs. Also under serious tension.
- Opener: The motor unit above. It’s only as happy as the door it’s lifting, and a stiff door quietly kills the opener.
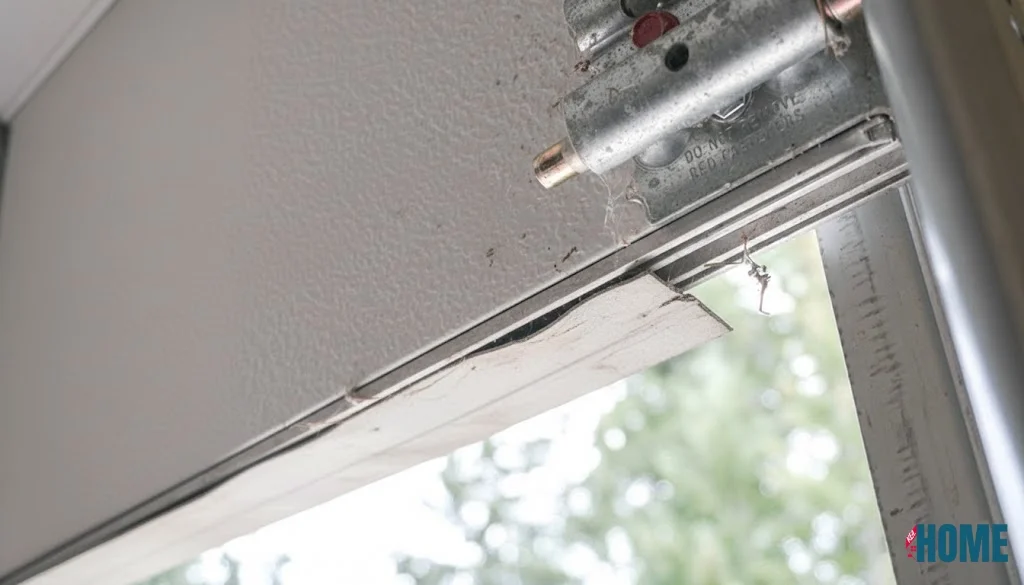
- Sensors and the bottom seal: The safety eyes near the floor, and the rubber strip that keeps the weather out.
- That’s the map: Most of what follows is just keeping those parts clean, moving, and balanced.
The stuff everybody should do, wherever you live
Do it on the first of every month; the whole routine is maybe fifteen minutes and it catches almost everything before it gets expensive.
Watch it and listen to it. Stand there and run the door up and down once, and actually pay attention. Does it move smoothly or does it hitch? Does one side lag? What’s that noise? A door that’s developing a problem gets loud and jerky long before it dies. You already know what yours normally sounds like. Trust it when it sounds wrong.
Do the balance test. This one’s the single best thing you can do, and people skip it because it sounds technical. It isn’t. Pull the release cord (the red one) to disconnect the opener; Do it with your foot ready to catch it the first time, until you know how your door behaves. Ideally, the door just stays right there. If it slams down or slams up, there’s something wrong with the springs, and the opener has been lifting the weight of the door every single cycle. That’s how openers die young.
Tighten what’s loose. A door cycles thousands of times a year; all that shaking will back bolts and brackets out over time. Run a 7/16 socket around the roller brackets and bolts, which is the size on nearly every residential door, and tighten anything loose. Nothing fancy.
Wipe the tracks, don’t grease them. People get this backwards constantly. The tracks want to be clean, not lubricated. The grease only picks up more dirt that turns into a paste that gums up the rollers. Wipe them out with a rag. That’s it.
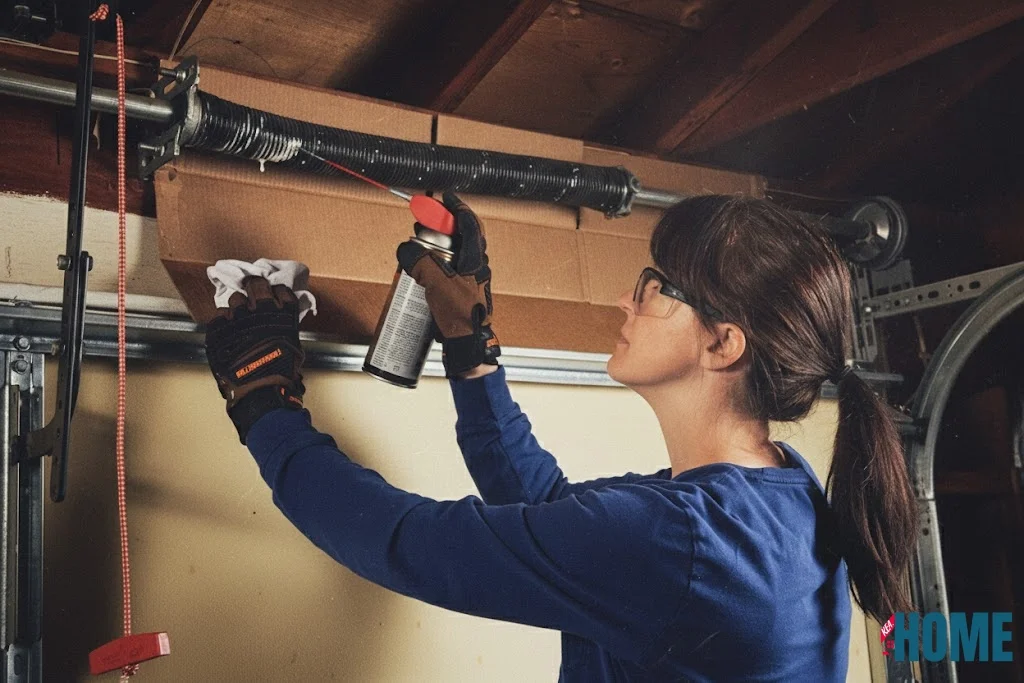
Lube the moving parts. The rollers, hinges, and springs, though, those you do lubricate. Use a silicone-based or garage-door lubricant, not WD-40. And this is important: WD-40 is a degreaser, it’s stripping off the protection from the metal and pulling in dirt, so you’re actually making it worse while feeling productive.
Check the safety reversal. Place a block of wood flat on the floor beneath the door and close it. The door should hit the block and immediately reverse. If it won’t stop pushing, the sensors or auto-reverse are off. This is the feature that keeps the door from crushing a child or pet. Don’t put that off.
Testing the Safety Features
Modern garage doors have two main safety mechanisms: photoelectric sensors and auto-reverse. Both exist to prevent the door from crushing whatever’s underneath it – pets, children, or that Amazon package the delivery driver left in exactly the wrong spot.
- Photoelectric sensors are the small units mounted about six inches off the ground on either side of the door opening. They project an invisible beam across the threshold. If anything breaks that beam while the door is closing, the door should stop and reverse immediately.
Test this by starting to close the door, then waving a broom handle through the sensor beam. The door should reverse within a second or two. If it doesn’t, check that the sensors are aligned (most have LED lights that indicate proper alignment) and that the lenses aren’t dirty or blocked.
- Auto-reverse is a backup system that triggers when the door physically contacts an obstruction. Place a 2×4 piece of timber flat on the ground in the door’s path, then close the door. When it touches the wood, it should reverse. If the door pushes down on the obstruction and stops without reversing, or worse, keeps trying to close, the force settings need adjustment.
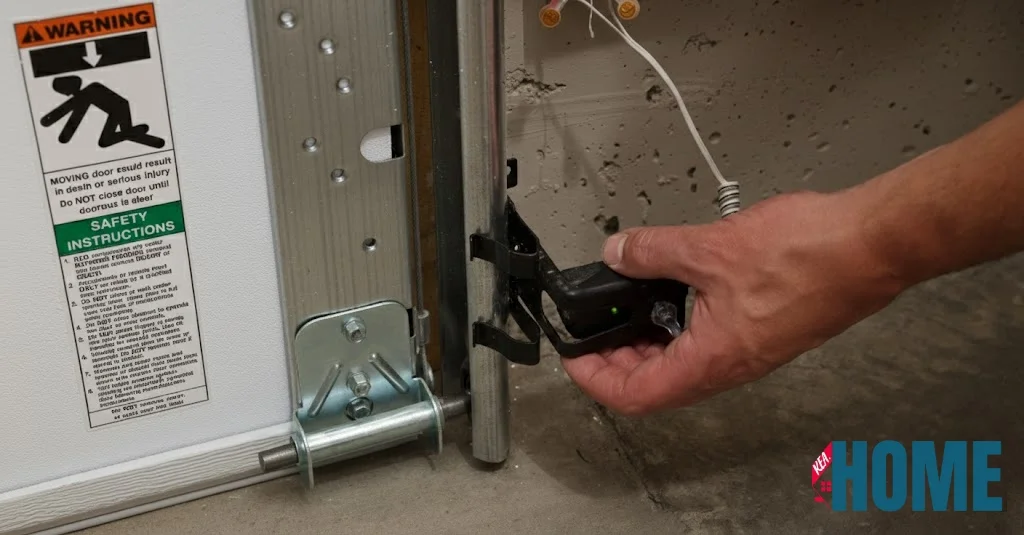
These aren’t optional safety features you can ignore. A garage door closing with full force can exert over 400 pounds of force, per DASMA safety standards. That’s enough to cause serious injury. If either safety system fails testing, stop using the automatic opener until you’ve sorted the problem. Most opener force adjustments are straightforward, but if you’re not comfortable doing it yourself, this is a reasonable time to call for garage door repair – safety systems aren’t something to get wrong.
Do that every month, and you’ve handled probably 80% of what can go wrong with garage doors. That other 20% is up to your climate.
A quick word on what the door’s made of
Before the climate part, know what your door is made of; that decides how hard the weather hits it.
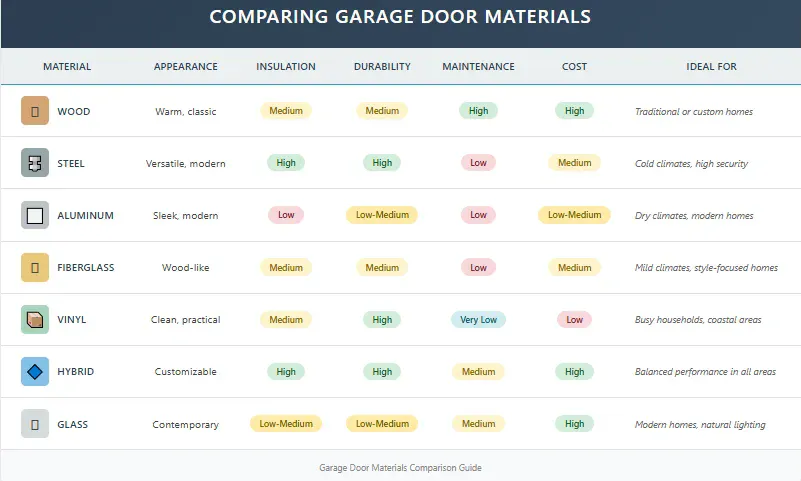
Steel is common; it insulates well and secures well. Bare steel is exactly what rust wants. Bare aluminum, while lightweight, doesn’t rust like bare steel. It dents easily. Vinyl and fiberglass are more resistant to moisture and salt than steel, so they win quietly along the coast. Wood looks best, but it asks the most of you. None of this means run out and replace your door. It means know what you’ve got, so you know what it’s vulnerable to, which is the whole point of the next two sections.
If you live in a dry, salty place (like San Diego)
You would think that dry air would be easy mode for a garage door, but there’s one thing nobody tells you about: salt.
Anywhere near the coast, you’ve got salt in the air. Salt does not just stay there: it will take moisture from the air and hold it against your metal. Even in a very dry climate, springs, rollers and hinges are constantly covered with a thin layer of salt water, and the damp salinity soon rusts the metal away. Springs which should last 10 years may become pitted and weaker several years beforehand. You’ll hear it before you see it, the door goes gritty and loud as corrosion roughens up parts that used to be smooth.
The coastal routine adds a few more items to the monthly list:
Rinse the door down with plain fresh water about once a month, more if you’re right on the water. Just a hose. Skip the pressure washer though, it forces water into seams and behind panels, which is the opposite of what you want.
Apply lubricant more often than an inland house would need, and use silicone or marine-grade lubricant rated for heavy saltwater exposure.
Keep that bottom weather seal in good shape, because a crack allows salty air to roll right in and rust out not just the door, but everything else in the garage.
If parts wear out, replace with nylon rollers and galvanized or stainless hardware. They cost a little more, but last considerably longer in the salt.
The line where I would stop DIYing: surface rust you can clean and lube. But when you can actually see the corrosion on the springs or cables themselves, pitting, flaking, discoloration, that’s not a wipe-down anymore, that’s tension hardware that’s been compromised, and it can let go without much warning.
That’s the point to bring in a professional garage door repair in San Diego and let someone deal with the high-tension parts. Because a corroded spring is not a thing you want to be standing in front of when it decides it’s done. Getting on it early, when it’s still one bad roller and not a chain reaction, is the difference between a service call and a whole new system.
If you live somewhere gloomy (hello, Seattle)
Different climate, different enemy. Here it’s not the salt, it’s the sheer persistent damp.
The real problem with a wet climate is that your garage stays more humid, and the moisture gets around the springs and rollers and they just never quite dry out. And constant damp does two quiet things: it rusts bare metal, sure, but before that it breaks down your lubrication. The grease that’s supposed to keep everything gliding gets thinned and washed-feeling, friction climbs, and now the rollers are noisy, the hinges are stiff, and the opener’s straining against a door that’s fighting it the whole way up.
So the damp-climate routine leans on moisture control with more frequent lubing.
Get some airflow. Vent it, crack the door on a dry day, or use a small dehumidifier if the garage is really sealed up and humid. Anything that stops moisture from just sitting on the metal all winter.
You will need to re-lubricate more often than indicated on the label, as the wet climate keeps stripping it; what lasts six months in Arizona may last two here.
Wipe parts down dry before you lube them, so you’re not just sealing moisture in under the grease.
Watch for standing water and rust blooms at the bottom of the door and in the tracks, especially where the door meets a wet floor.
And the same honest line applies. Squeaks and stiffness you can handle with a rag and some lube. But when the springs start showing real rust, or the door’s getting genuinely hard to lift, or the opener’s grinding, catch it early: get a technician out at the first proper sign of real wear instead of letting an alignment or tension problem compound, because damp-climate wear rarely stays a one-part problem for long. Damp climates punish “I’ll deal with it later” harder than most.
The only part you don’t touch
The springs and cables are the part that puts people in the emergency room. The springs and cables are under a lot of tension, enough to crush a hand or worse if you’re working on it. Cleaning, lubing, tightening brackets, running the balance test, all fine, all yours. But when it comes to adjusting a spring or cable? Nope. That’s the line. It doesn’t matter how handy you are, how good the YouTube video is. That’s the job you hand to someone with the right tools, in any climate.
I would tell a friend this
Preventative maintenance comes down to one thing: actually listen to the door, instead of tuning it out. The failures that strand you are almost always the ones that spent weeks getting louder, until everyone in the house learned to ignore the noise.
And one tip worth more than any of these: the next time you’re in the garage anyway, go ahead and pull the release cord and lift the door manually just once. Feel it, heavy, awkward, unwieldy. That’s your baseline. And so six months from now, if it feels heavier or rougher than that memory, something’s changed, and you’ll catch it while it’s a fifteen-dollar fix instead of an emergency call-out.

 Decor & Improvement Accessories