

Home & Decor Blogs: DIY, Interior Design & Lifestyle Ideas
How to Design Your Dream Backyard Oasis: A Simple Step-by-Step Guide

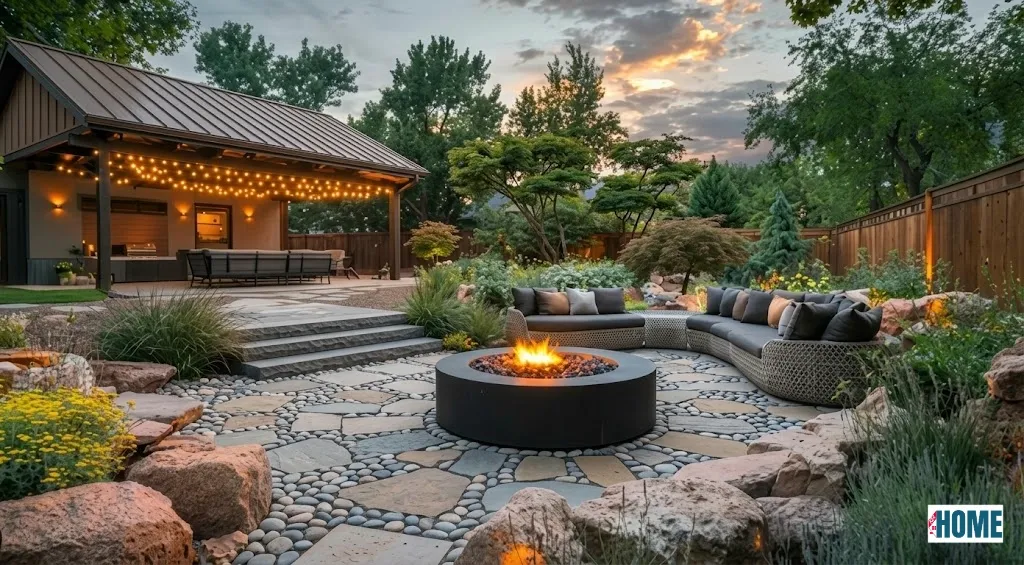
Most people are pouring money into kitchens and bathrooms while the backyard sits there holding lawn chairs nobody uses and a grill that hasn’t been scrubbed since last Fourth of July. Which is odd when you stop and think about it, because the backyard is the one room in your whole house with unlimited ceiling height and free ventilation, and it’s being treated like an overflow closet.
The spending’s starting to catch up to that, though. Grand View Research put the U.S. outdoor living structures market at $892.9 million in 2024, growing 5.3% a year through 2030, and a Fixr survey found 98% of architecture and remodeling pros agreeing that an updated outdoor space moves home value in a real way. So this isn’t only about wanting somewhere nicer to drink your coffee on a Saturday. There’s money sitting in it.
The trick is doing it in the right order. Skip a step early and you’re tearing up finished work later to fix what you should’ve handled first. So here’s the build, roughly the sequence I’d follow.
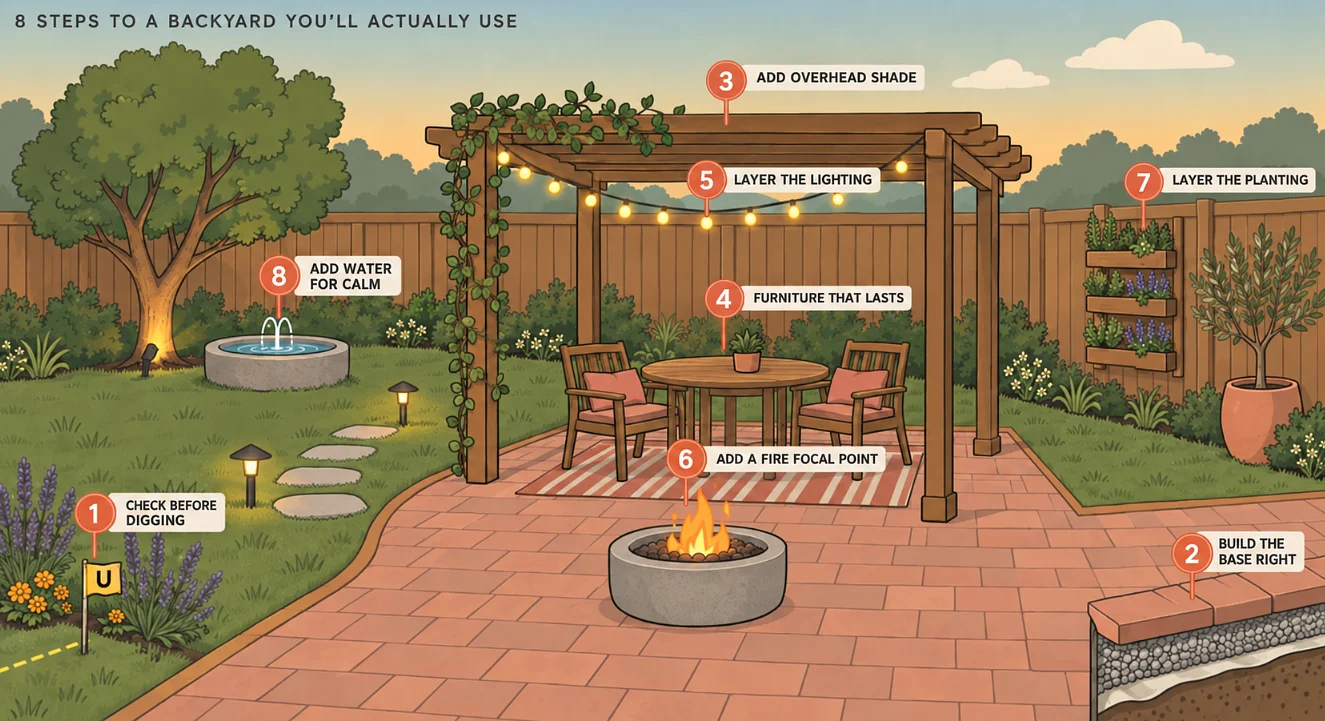
Step One: Find Out What’s Buried Before You Dig
Everybody knows to call 811 first. Good, do that. But here’s what 811 isn’t telling you.
They only mark public utility lines. Over 65% of the utilities running through a residential property are privately owned, and none of it gets flagged, the irrigation pipes, the security wiring, the septic connections, the landscape lighting cables, the dead sprinkler system the last owner never bothered mentioning. All of that’s down there waiting.
Clipping an irrigation line isn’t going to hurt you the way a gas line would, but it stops the whole job dead. Now you’re on the phone to a plumber, watching the weekend disappear, spending money that was never in the budget. Cheapest way around it is booking a private utility locating service before a shovel goes anywhere near the dirt. They’re sweeping the whole property with ground-penetrating gear and flagging what’s underneath, and it costs a fraction of what you’d pay to fix something you tore through by accident.
While you’re waiting, watch the yard for a couple of weeks. Where’s the water pooling after a hard rain. Which corner’s getting cooked by the afternoon sun. Where’s the wind cutting through hardest. Sketch it on paper, nothing fancy, just a rough map with notes, and that one drawing keeps you from dropping a dining table in the spot that floods or planting shade ferns somewhere they’ll fry by ten in the morning.
Step Two: Get the Base Right or Everything Shifts Later
Whatever you’re building is only ever as good as what’s underneath it. Get the base wrong and you’re chasing the same problems for years, pavers settling, water pooling, chair legs sinking into soft ground every time someone sits down.
Gravel’s the reliable foundation.
It’s draining well, holding back erosion, keeping weeds down, and the install is about as basic as it gets. You’re clearing whatever’s growing there, leveling the ground, rolling landscape fabric across it, then spreading the gravel and tamping it down every few inches as you go. Crushed stone works, and so does paver base, which is just crushed stone cut with sand, and which one you pick depends on what’s sitting on top.
Wood is the one surface that keeps asking for something back. Boards sitting against damp ground, or tucked under a planter, are staying wet long after the rest of the deck has dried out, and that’s exactly where rot gets going, from underneath, months before anything’s showing on the surface. Worth looking at what Deck Guardian and systems like it are doing at the joists and the contact points rather than just sealing the face you can see, because the boards on top are rarely the part that goes first.
Edging is what tells one zone from the next. Paver edging locks your materials in along the perimeter and holds them there for good. Brick edging wants a tamped bed underneath, a few inches of crushed gravel topped with sand so it drains.
The yards that actually feel good underfoot are mixing surfaces. Something soft you’d cross barefoot, and enough hard surface that a table and chairs stay put. Flagstone in one spot, decomposed granite in another, a section of wood deck somewhere else. Different textures, one yard, and it’s reading as a single space with jobs to do rather than a chopped-up mess.
Step Three: Put the Shade In Before Anything Else
Nobody uses an unshaded patio. You’ll set up the furniture, buy the cushions, string a few lights, and then from June through September the whole thing’s sitting empty because it’s unbearable by noon.
Shade is what decides whether you’re using the space four months a year or eight. That’s why it goes in early, not as an afterthought once the furniture’s already out.
Pergolas are the usual answer, and the price spreads wide. Aluminum kits are running $10 to $30 a square foot if you’re building it yourself. Wood, so cedar, redwood, pressure-treated, lands between $20 and $50 a square foot, and that’s before you’re staining it every couple of years to keep it alive. A 10′ × 12′ aluminum pergola comes in somewhere between $1,200 and $3,600 installed. Same size in wood, you’re looking at $2,400 to $6,000.
| Material | Cost/Sq Ft (DIY) | Maintenance | How Long It Lasts |
|---|---|---|---|
| Aluminum | $10–$30 | Basically none | 20+ years |
| Pressure-treated wood | $20–$35 | Stain/seal every 2–3 years | 10–15 years |
| Cedar | $25–$45 | Stain every 2–3 years | 15–20 years |
| Vinyl | $25–$55 | Occasional wash | 15–20 years |
What the pergola’s standing on depends on your ground. Posts sink straight into soil at ground level. Galvanized steel brackets bolt down onto an existing deck. Concrete slabs are the answer where the terrain’s uneven. And this part matters more than which material you picked, because a pergola that’s wobbling or shifting in the wind is both a hazard and an eyesore, so getting the foundation matched to your actual conditions is the thing to sweat.
Step Four: Buy Furniture That Survives the Weather
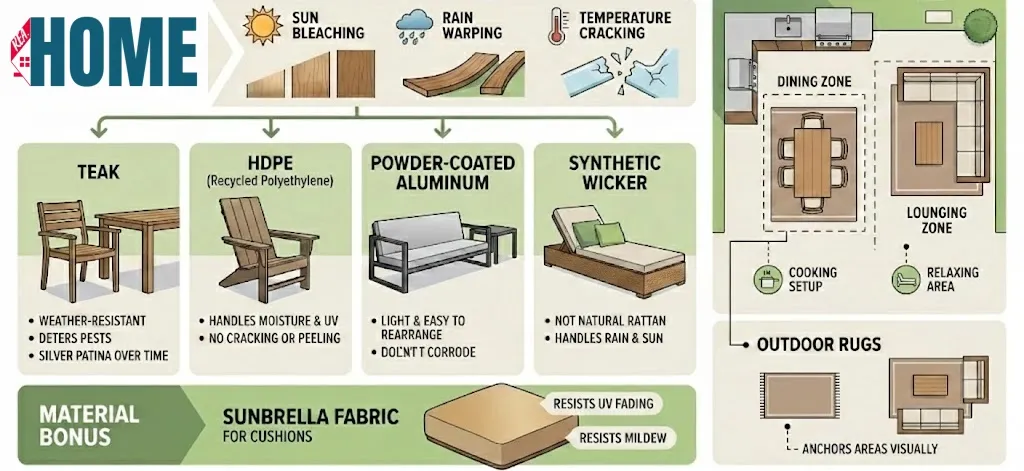
Everything you’re putting outside is getting punished. Sun bleaches the color out, rain warps the cheap wood, and one hard freeze cracks anything brittle. Buy the wrong materials and you’re replacing the whole set inside two years.
What actually holds up:
- Teak – shrugs off weather, keeps pests away on its own, and silvers into a nice patina over time. Costs a lot, but you’re buying it once
- HDPE (recycled high-density polyethylene) – takes moisture and UV without cracking or peeling, and it’s showing up everywhere now for good reason
- Powder-coated aluminum – light enough to shove around when you want to rearrange, doesn’t corrode, barely needs a thing
- Synthetic wicker – not to be confused with natural rattan, which falls to bits outdoors. The synthetic stuff handles rain and sun fine
- Sunbrella fabric for any cushions – resists fading and mildew, and it’s earned its spot as the default for outdoor upholstery
A bigger patio works better broken into zones. Dining near wherever you’re cooking, lounging set further off. Slide an outdoor rug under each group and it’s anchoring the area, keeping the whole thing feeling deliberate instead of like furniture that got scattered around.
Step Five: Light It in Layers, Not One String of Bulbs
Most people are throwing up a string of bulbs before a barbecue and calling it lighting. That’s decoration. Real outdoor lighting is working in layers, and each layer’s doing a different job.
Start with security. Motion-activated flood lights go up somewhere between 8 and 15 feet, aimed at the entry points and the dark corners. Then you’re laying path lights along the walkways so people can actually see the steps and grade changes after dark. String lights or wall sconces bring the warmth. And a couple of spotlights picking out a tree or some feature are giving the whole yard depth once the sun’s gone.
Run LED fixtures for anything that’s on regularly, and the math isn’t close. Per the U.S. Department of Energy, LEDs use up to 75% less energy than incandescent and last up to 25 times longer, which works out to 25,000 to 50,000 hours against roughly 1,000. For a fixture burning a few hours every evening, that’s the gap between changing bulbs constantly and forgetting they’re even there for years.
One thing people are getting wrong is color temperature.
Stay in the warm range, 2700K to 3000K, for that slightly amber tone that makes a space feel like somewhere you’d want to sit. Push past 4000K and it’s starting to look institutional, more gas-station forecourt than backyard.
Step Six: Add Heat and Steal Back a Few Months
A backyard that’s only comfortable May through September is only paying you back for five months. Drop in a heat source and you’re pushing that toward eight or nine depending on where you live, which is a huge jump in how much use you’re pulling from everything else you spent on.
Fire pits do something patio heaters just don’t, and I’ll be honest, it’s not rational. People gather around fire. They always have, it’s wired in somewhere deep. Gas fire pits are lighting instantly and leaving no mess. Wood-burning ones are giving you the smell and the crackle, but now you’re minding the ash and watching for sparks near anything that’ll catch.
Patio heaters make more sense under cover, where an open flame isn’t smart. A propane unit around 40,000 BTUs is warming a decent radius, though wind’s cutting that down fast. For a sheltered spot, electric infrared heaters mounted overhead do the better job.
If you want to take the idea of year-round outdoor living a step further, a dedicated garden building can provide a more comfortable space than an open patio. Insulated garden rooms are particularly useful for creating a flexible area that can be enjoyed for work, hobbies, relaxation, or simply as an extra room away from the main house.
Step Seven: Pick Plants That Earn Their Keep
Greenery shouldn’t just be filling space. Pick plants that are solving something while they’re at it.
When ground space is tight, you’re going vertical. Hanging baskets, planters mounted on the wall, shelving with pots up against a fence. Fabric pouches strapped to the fence boards are growing herbs better than you’d think, and a length of old guttering mounted sideways handles strawberries and shallow-rooted greens, which sounds daft until you try it.
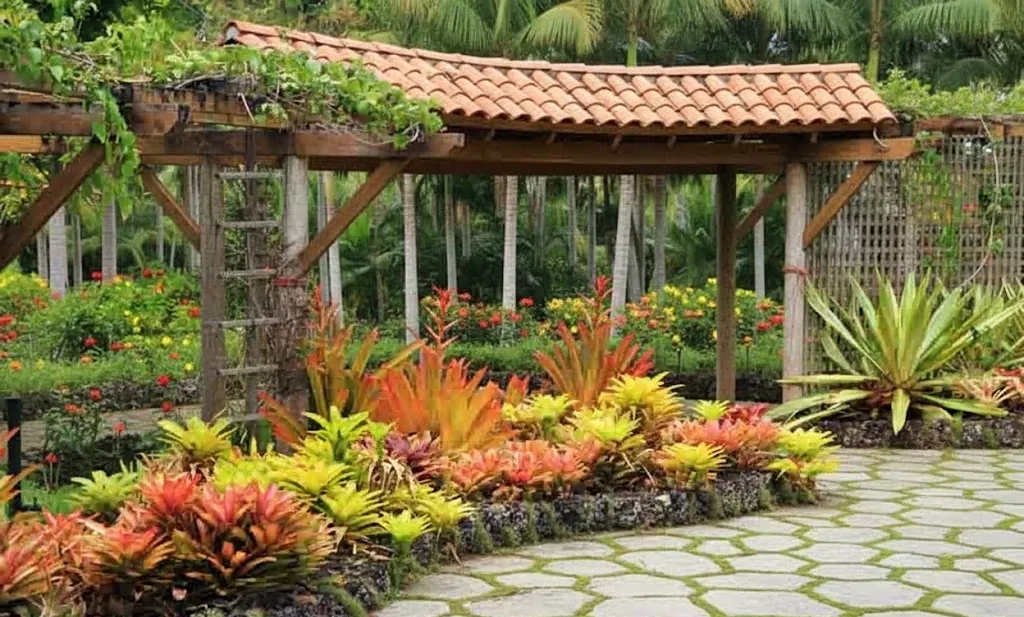
For pest control that plants itself, lavender, marigolds and basil are putting out scents mosquitoes keep away from. You’re planting things you’d probably want out there anyway and getting fewer bites in the evening as the bonus. If you’re after a tropical lean, canna lilies and elephant’s ear push it that direction.
Container gardening on the patio barely takes any room. Salad leaves and shallow-rooted herbs are happy in pots, and climbing beans are running up a trellis and making food out of vertical space that wasn’t doing a thing before.
Step Eight: A Water Feature for the Sound as Much as the Look
A fountain or a small pond is doing two jobs at once. It’s giving the yard something to look at, and it’s putting out enough ambient sound to bury the traffic and the neighbors.
In a tight city backyard that second one matters more than people expect, because it’s making the space feel a good deal more private than it actually is. Self-sustaining ponds are running themselves once they’re established. Solar fountains cost nothing to operate. Container water gardens sit on a deck with no digging at all. About 19% of homeowners who redid outdoor spaces in 2024 were adding a water feature, per Houzz data reported by This Old House, so it’s common enough that you’ll find options at every price point.
What the Whole Thing Costs, and What It Gives Back
Backyard costs swing hard depending on what you’re starting with and how far you take it. Rough component pricing at least gives you something to budget against:
- Gravel/paver base (DIY materials): $1–$3 per square foot
- Pergola: $1,200–$6,000+ depending on material and size
- Decent outdoor furniture set: $1,500–$5,000
- Landscape lighting (LED, professionally installed): $2,000–$5,000
- Fire pit: $300–$3,000 (portable through built-in)
- Water feature: $1,100–$7,500 installed
The return side is where it gets interesting. A well-done patio can lift home value 8% to 12%. The National Association of Realtors found a full landscape upgrade running about 100% cost recovery on roughly $9,000 spent, and an attached deck adding close to $20,000 to what a home’s worth, with owners getting back around 75% at resale.
The whole thing hangs on execution, though.
A backyard thrown together with cheap materials and no real plan doesn’t photograph well, doesn’t move a buyer, and isn’t adding what those numbers promise. The return is coming from spaces that look like somebody actually thought them through, the materials chosen on purpose, the lighting done right, the zones laid out around how people really use a yard. That’s what’s landing in the listing photos, and that’s what gets the offers moving.
 Decor & Improvement Accessories