

Home & Decor Blogs: DIY, Interior Design & Lifestyle Ideas
Installing a Ductless Mini Split: What to Expect, What It Costs, and What Breaks Them
A ductless system is a simple idea done precisely. One outdoor compressor, one or more indoor heads on the walls of the rooms you care about, and a refrigerant line set connecting them through a hole about three inches wide. No ducts, which matters more than it sounds, because ducted systems lose 20 to 30 percent of their energy just moving air through the ductwork, and a house that never had ducts gets to skip that tax entirely. But the simplicity is deceptive. Almost everything that goes wrong with these systems traces back to three decisions made before anyone turned it on: the size, the placement, and who did the install.
Sizing Comes Before Everything Else
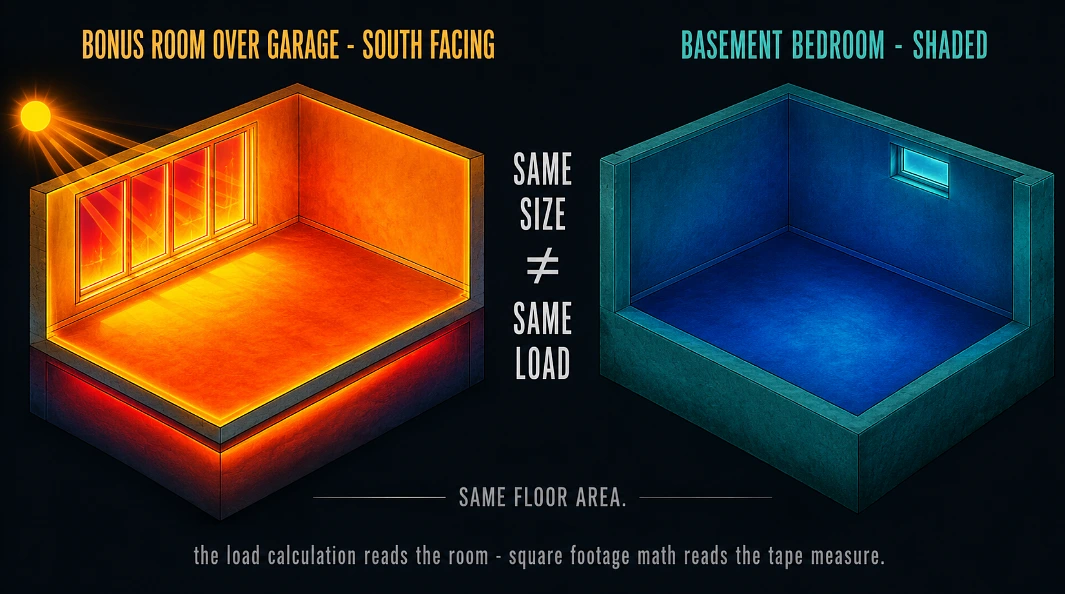
The right size comes from a load calculation, not from square footage math on the back of a quote. Room dimensions matter, and so do insulation, window area and direction, ceiling height, and what the room is used for, a south facing bonus room over a garage needs different capacity than a shaded basement bedroom of the same size. Undersized units run flat out on hot days and never quite get there. Oversized units short cycle, on, off, on, off, which wears the compressor, wastes power, and leaves the air cool but clammy because the unit never runs long enough to pull moisture out. And in a cold city there’s a second sizing question stacked on the first: most modern units are heat pumps that heat as well as cool, and if you want the heating side to carry real weight through winter, you need a cold climate model with published capacity figures at low temperatures, not a base model that quietly gives up at minus 15.
Placement Decides How Well It Works
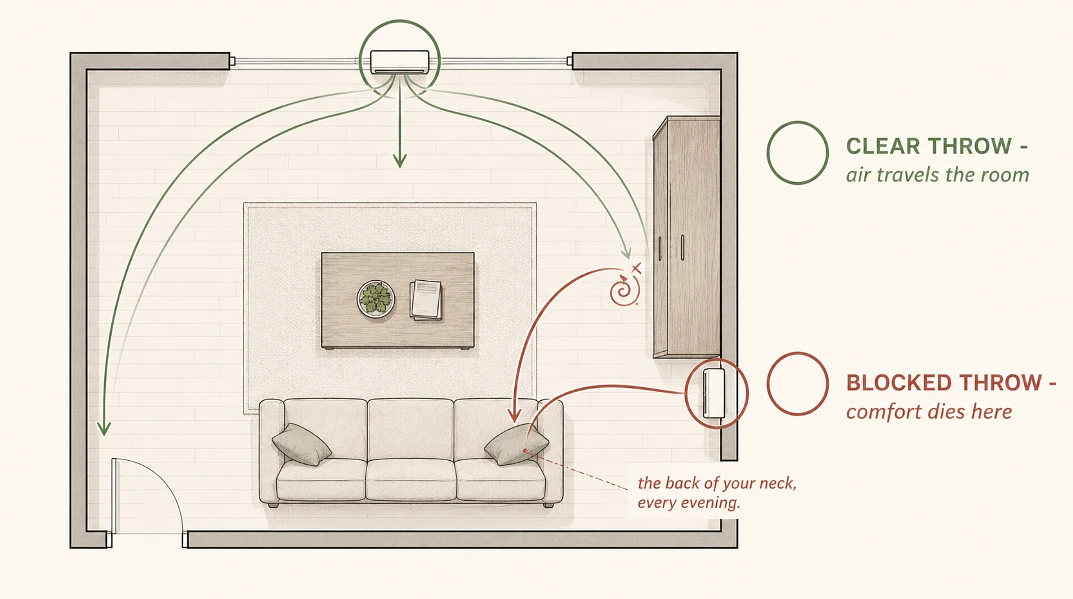
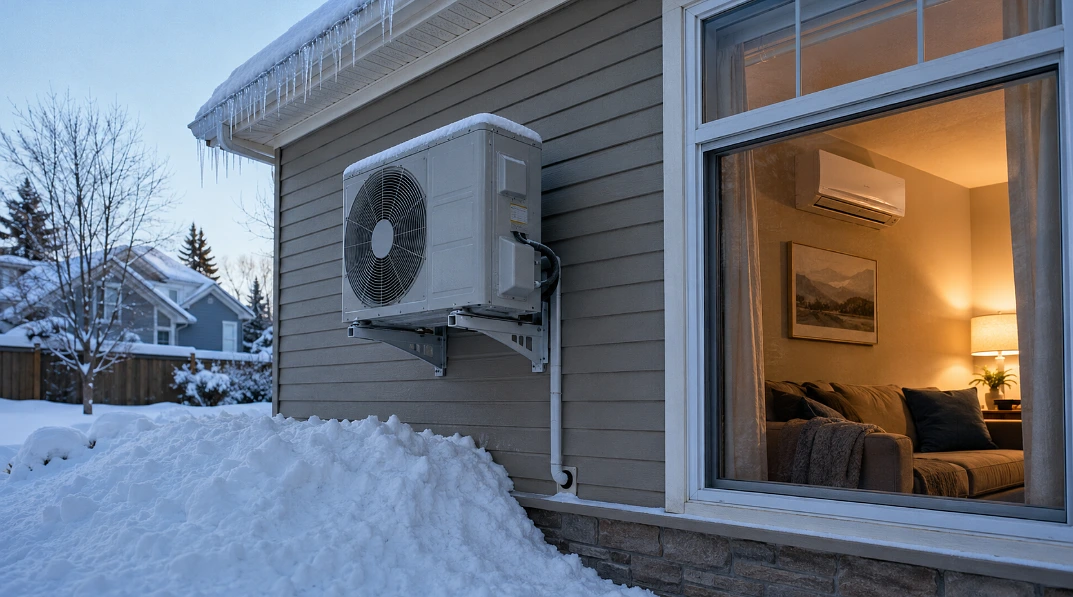
Indoor, the head wants a spot where its air can travel the length of the room without hitting a beam, a tall wardrobe, or the back of your neck on the couch. High on a wall with clear throw across the space is the standard answer for a reason. Outdoor placement is where cold climates rewrite the generic advice, because a compressor sitting on a ground pad in Edmonton spends part of the winter buried. Wall brackets or a raised stand that lifts the unit above the snow line is the local standard, kept clear of roof edges where sliding snow and dripping ice land, with around two feet of open space for airflow and enough access that a technician can actually reach it. Ten minutes with the installer walking the outside of the house settles all of this, and it’s ten minutes well spent, because a badly placed outdoor unit stays badly placed for fifteen years.
What Install Day Looks Like
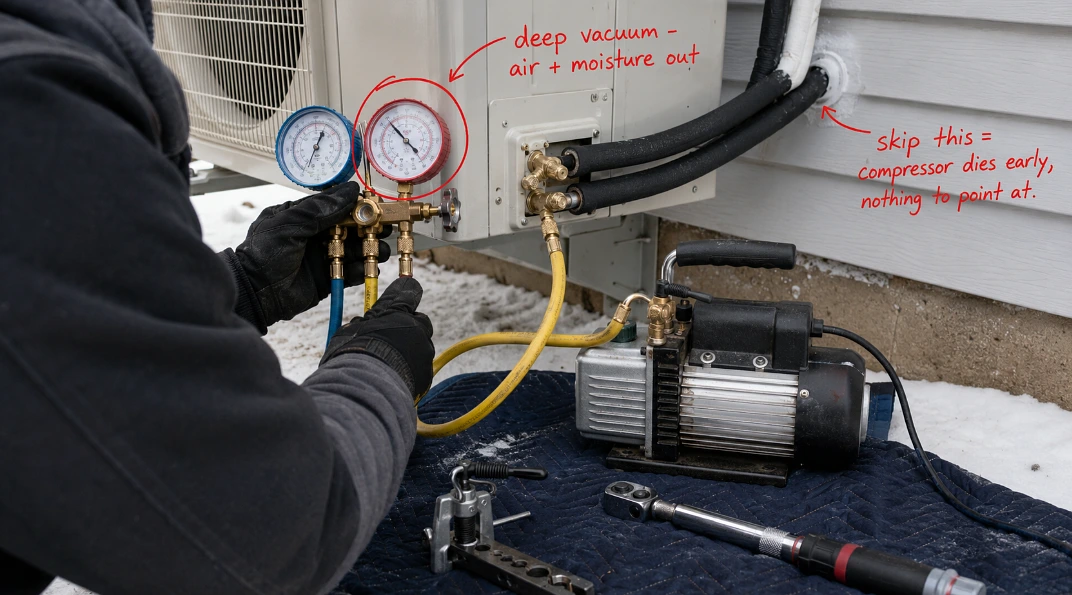
A single zone install runs about 4 to 8 hours, and the sequence is the same almost everywhere. The crew mounts the indoor bracket, drills the three inch hole through the exterior wall with a slight downward slope so condensate drains out instead of in, and feeds through the line set, the drain line, and the control cable. Outside, the compressor goes onto its brackets or stand, the refrigerant lines get flared and connected, and then comes the part that separates a real install from a cheap one: the crew pressure tests the lines, usually with nitrogen, then pulls a deep vacuum on the line set with a pump before releasing any refrigerant into it. That vacuum step removes air and moisture from the lines. Skip it, and the moisture left inside slowly reacts with the refrigerant and oil, and the compressor dies years early with nothing to point at. Expect some drilling noise, a visit to your electrical panel for the dedicated circuit and outdoor disconnect, and a commissioning run where the tech checks temperatures and current draw before leaving. Multi zone jobs stretch to a day or two.
Why the Installer Matters More Than the Brand
Refrigerant work is certified work in Canada, flare joints leak when they’re made carelessly, and manufacturer warranties are generally conditional on qualified installation, so the box brand matters less than the hands. Companies quoting mini split installation Edmonton jobs, the local plumbing and heating shops and the bigger HVAC outfits alike, should be able to answer two questions before anything gets signed: who on the crew holds the refrigerant certification, and do they pressure test and pull a vacuum on every line set. A company that answers both without blinking is quoting a real install. One that talks past them is quoting a box on a wall.
The Weather That Gives These Systems Trouble Here
Edmonton hands a mini split four separate tests a year. June brings poplar fluff, and that white drift coats condenser coils like a filter that never gets changed, choking airflow exactly when the first hot week arrives, so a gentle rinse of the outdoor coil in late June is close to mandatory here. Summer thunderstorms throw hail that bends the thin aluminum fins, which restricts airflow the same way, a cheap fin comb straightens minor damage. Smoke summers clog indoor filters in half their usual time, so in a bad smoke stretch, check them every two weeks instead of monthly. And winter is its own exam if the unit heats: freezing rain casing the outdoor unit, snow drifting against it, and defrost cycles running more often than owners expect, all of which the raised mounting and clearance from earlier were quietly preparing for. Cooling only units mostly sleep through winter, though keeping the top of the unit clear of ice fall is still worth a glance.
The Maintenance That Keeps It Alive for 15 to 20 Years
The routine is honestly light. Pull the indoor filters every two to four weeks during heavy use, rinse them, let them dry fully, and slide them back, that one habit protects airflow, efficiency, and the air you breathe. Once a year, power the system down and hose the outdoor coil gently from the inside out, and keep plants and fences two feet back. Watch the little drain line too, water dripping from the indoor head means the condensate path is clogged, not that the unit is broken. Beyond that, a professional service visit every year or two covers refrigerant charge, electrical connections, and a deep clean of the blower wheel, which is the fix when the unit starts smelling musty at startup.
The signs it wants attention before a breakdown:
- Airflow noticeably weaker than it used to be, even with clean filters.
- A musty smell in the first minute after startup.
- Water dripping from the indoor head, or ice forming anywhere on the line set.
- Rooms drifting away from their set temperature on days that never used to be a problem.
- Error codes on the head or remote, photograph them before resetting anything.
Costs, Lifespan, and the Mistakes That Shorten Both
In Canadian markets, a quality single zone install runs about $3,500 to $6,500, premium cold climate equipment pushes $5,500 to $8,000 and up, and multi zone systems land between $6,000 and $12,000 or more depending on heads and routing, with labor taking 30 to 50 percent of any total. Cared for, the system should give 15 to 20 years. The mistakes that cut that short are the same few on repeat: oversizing because bigger felt safer, mounting the outdoor unit at grade in snow country, skipping the annual coil rinse, hiding the indoor head where its airflow dies, and flicking the system on and off all day when inverter units are built to modulate quietly at a steady setting. Set it, let it run, clean the filters, and rinse the fluff off in June. Most of the fifteen years takes care of itself after that.
 Decor & Improvement Accessories